The Crypt of the Phantasm: Construction
Assembling the Phantasm
First, build your Flying Crank Ghost according to the instructions from Phantasmechanics. It's a good idea to have your FCG ready before building the crypt, because you'll want to check it against the size and weight of the ghost and its mechanism, or at least hang it up in there when you've got the crypt frame built for a little fun.
Spend some time with the ghost - don't just knock it out quickly - because this is what your visitors will really be looking at. Here's my nephew giving the ghost some real hands instead of the white card stock cutouts we had as placeholders:
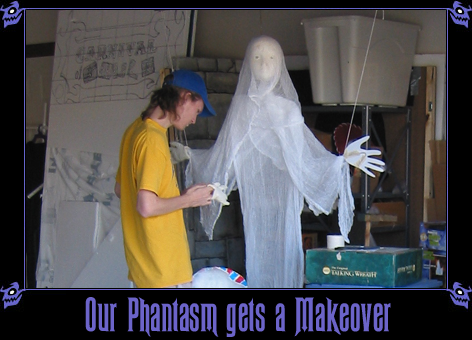
I strongly recommend going the extra mile and adding LED eyes. As an electronics neophyte, I was able to follow the instructions easily, and soldered my first electrical circuit for this project, and it was pretty easy. If you're new to electronics, this is a really good starter project.
Assembling the crypt frame
Before getting started, be sure to sketch out your crypt design with a detailed plan so that you know what you're doing, especially if you're going to be making modifications to the plans presented here. Make sure you understand how it all works together, because you'll have to make some adjustments and cuts along the way to make everything fit, and you don't want to cut the wrong thing.
Once you've got a plan in mind, you can start building the crypt frame.
|
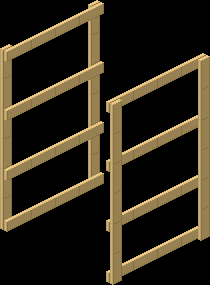
1. Build the left and right frame wallsThe left and right frame walls are the same. Cut two 1"x4"'s down to 6' lengths, and then cut four down to 4' lengths. Using these, you can assemble the two frame walls using the short wood screws. The top and bottom supports should be flush with the top and bottom of the left and right supports, but the other two can be placed anywhere - they're just there for adding rigidity to the structure. |
|
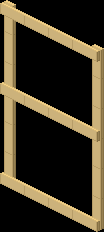
2. Build the back frame wallThe back frame wall is almost identical to the left and right frame walls, except if you put the supports in the same place, they'll run into each other. I only used one support across the back, but you could use two if you like. |
|
|
|
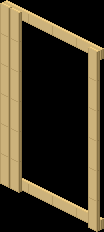
3. Build the front frame wallThe front frame wall is fairly similar to the other walls, except that because the front will be open, we cannot place horizontal support bars anywhere but the top and the bottom. In addition, we are going to need a place to mount the gate, so we attach another 1"x4" vertically next to the leftmost one. This is the first wall you'll build where the inside and outside facing matters, so keep in mind the rule for which side of a frame wall is facing "outward": The vertical beams always face outward so that there is more surface area to attach the foam to. |
|
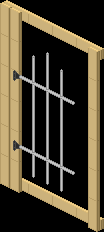
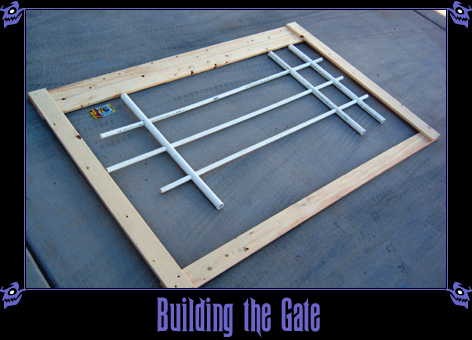
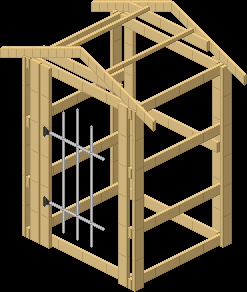
4. Build the gateBefore you assemble the crypt, now is a good time to build the gate that will hang off of the front of the crypt, since you can lay it down on the ground with the front frame for reference. The gate assembly is rather simple. It is two lengths of thick PVC about three feet long with holes drilled in it for three thin lengths of PVC to be dropped into. Lay the front frame on the ground for reference, and measure the PVC lengths you want. It helps to place another 1"x4" on the right hand side so you can visualize how wide the actual opening will be. Mark the PVC how you want it, and drill the holes to create the gate you want. To actually drill the holes, it helps to construct a cradle out of scrap wood for the PVC to lie in while you drill. A pilot hole also helps - drill a small hole first to guide the larger hole. If you want, you can now attach the gate hinges to the frame, but don't attach the gate yet. (The gate hinges we found allowed the PVC to just slide onto the hinge, which we could then tighten with a screw through the PVC, so the gate was easily removable.) |
|
|

|
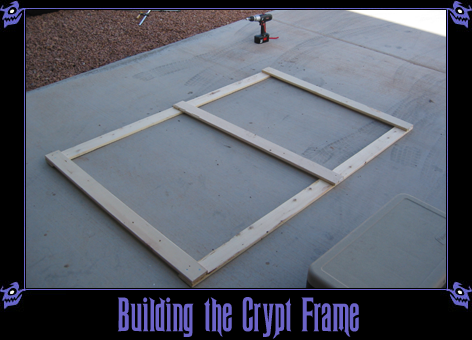
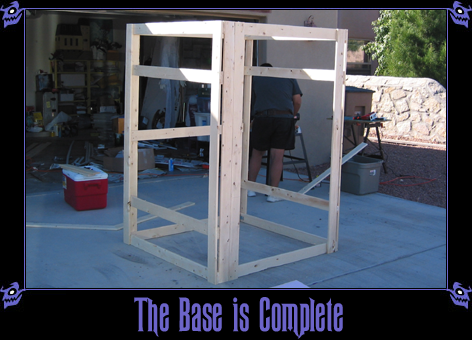
5. Assemble the base frameNow you can screw the frame together using the L braces to form a free-standing structure. Remember: vertical beams always face outward. Note the position of the side walls and the front and back walls. You will be screwing through the side walls into the front and back walls to attach them, so that the front and back of the crypt are flush with the sides of the side walls. This is so that the crypt presents the largest area towards your visitors, but it does make the crypt wider than it is deep by several inches. If this bugs you, screw them in the other way, but note that this will change the way you assemble the foam pieces that go around the crypt later, so be sure you've thought ahead! |
|
|
|
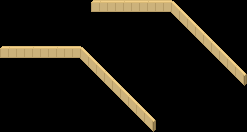
6. Cut the gable supportsNow comes the part where a table chop saw comes in really handy. You need to cut the 1"x4"'s to get four four-foot-long pieces with a straight cut on one end, and an angled cut at the other end. The first thing you'll want to do is figure out how steep you want your pitched roof to be. We decided a 30° angle was good for us, so we cut the angle at 60° (90° - 30°), but you can use whatever angle you want. Since one end of the support will be angled, make sure you measure the longest side - this is the side you want to be four feet long, the side that faces up. (This is because the roof is going to be a 4'x8' sheet of foam cut in half, so the length of each roof section needs to be 4'.) Make sure that they sit flush against each other nicely so they can be easily attached to each other later. |
|
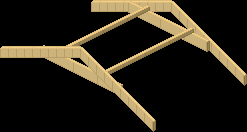
7. Assemble the gable structureLay two of the gable supports down on the ground, and position them so that the pitch ends are flush. Lay another 1"x4" across it horizontally and measure it for length, and cut it. Screw it into the gable supports to give it support. The side you screw this support beam into will be the inside of the crypt. Then, screw in two L-braces at the apex of the gable, on the same side as the support (the inside), to hold the gable supports together at the top. Repeat this process for the other pair of gable supports. Cut two lengths of the 1"x1" so that they are four feet long minus the width of the two gable pieces. Place a gable support frame on the ground, then put the lengths of 1"x1" on it, and then put the other gable support on top of that. Measure to make sure it's 4' tall, and then start screwing through the gable supports into the bases of the 1"x1" to create crossbars that go between the gable supports. You should now have a gable support structure that is free-standing. If it seems wobbly, reinforce it with more support beams - you don't want this assembly coming apart, because it will take your crypt and your ghost along with it if it does! |
|
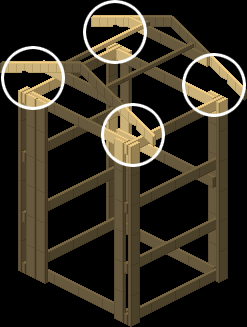
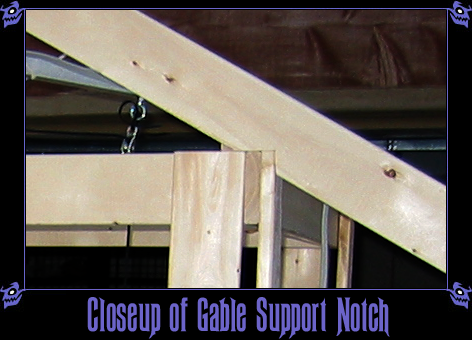
8. Cut notches for gable structureNow, if you were to try to put the gable structure on the base structure right now, you'd be balancing it on sloped beams, which isn't exactly stable, so we're going to cut some little notches in the bottom side of the gable structure to give it some flat places to sit on the base structure. (See the diagram and the photo below.) This part requires some helpers. Lift the gable structure onto the base structure, and mark the gable support beams where the outermost parts of the crypt structure reach. Make sure your structure is level, and double-check your structure with a level and measurements - you don't want a lopsided crypt roof (or maybe you do). Once you have those points, you can cut vertically up a few inches and then horizontally across to create a notch that the base frame can slip into. Ideally, the fit will be snug, but as long as it can sit on the notches, you're good. Test it when you're done to make sure you don't need to make any adjustments - it should fit squarely on all four notches. |
|
|
|
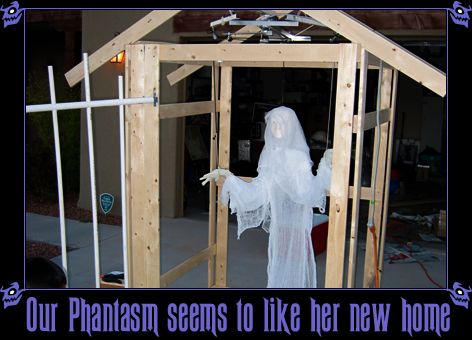
9. Try it out!Now, assemble it all, and hang your FCG in there to see how it feels, both from a visual sense and a stability sense. Add support if you need it. You should now have a sturdy, standalone wooden frame for the crypt, large enough to house your FCG. Note that the gable structure is removable for easy (or, at least, easier) storage and transportation. If you have the storage space, you could attach the gable structure now for more stability. You are now ready to start building the foam facade for the crypt. |
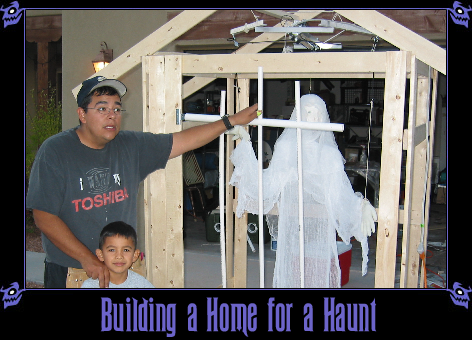
(The taller guy in the photo above is Daniel, my bud who came out and helped me build the crypt frame. We had it done in a weekend, working about three hours each day.)