The Magic Mirror: Detailing
Before you detail the foam, you may decide that you need to strengthen the foam a bit before proceeding. If you couldn't find the stronger pink foam we mentioned earlier, and are using the more fragile white beaded styrofoam, you'll probably want to do this step. If you managed to use the pink foam, you probably don't need to do this and can continue on to "Painting the Foam" below.
Strengthening the Foam (optional)
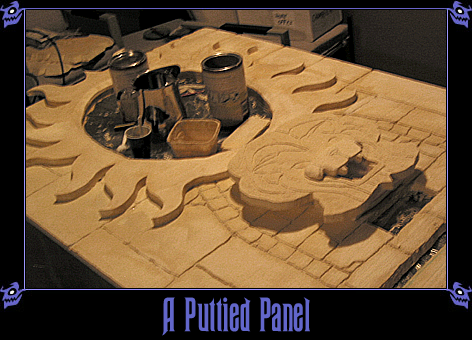
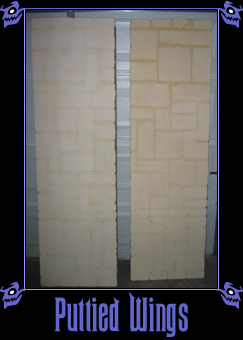
Since we want the foam to withstand being moved around and touched by trick-or-treaters, we want to strengthen it a bit. To do this, you can use Durham's Water Putty like paint to paint on a strengthening layer to the foam.
Mix the Water Putty with water until you get a consistency about like Latex paint, then generously brush it onto the foam. Work with small batches of putty, since the putty dries very quickly.
The putty can then be used at a thicker consistency to give it a stonier texture, or to build in a little transition between layers of foam.
When it dries, the foam becomes stiffer and sturdier.
Be sure to wait for the putty to dry before trying to paint it.
Painting the Foam
Now it's time to paint your facade. This is the fun part! Only use latex paint on the foam! Other paints may dissolve all your hard work!
We recommend experimenting with different painting techniques on some scrap pieces of foam before starting on your facade.
Cover all your foam with the base color. We used a mismixed batch of gray we got at the local Home Depot on the cheap, but you could use any stony color from a slate blue to a sandstone tan to a marbled green. (The Water Putty makes it a nice sandstone color naturally, but I'd still recommend giving it a base coat, just to protect it from anything that might get spilled on it.)
Once that has dried, you can start brushing in the stone detail. Start with the deep grooves. We brushed a deep black into the grooves and a watery black along the edges of the bricks, using a paper towel to pull out unwanted color when necessary. Put more black at the bottom side of bricks than the top, to suggest shadows.
Then paint a faint wash of black over some of the bricks to give them some variety. You can also use varying washes of black to visually push some bricks back in relation to the others.
Once that's dry, you can either dry-brush some white highlights onto the foam or do a watery white wash in places for a different feel.
Paint all your foam pieces. Try to use a consistent method throughout so that all the stone matches. You may find that it helps to have the same one or two people do all the painting for this reason.
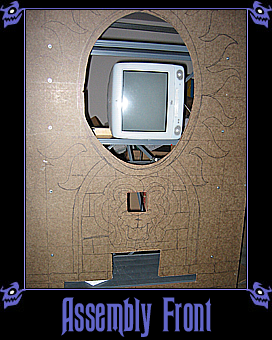
Assembling the Facade
Finally, it's time to assemble your facade! You might want to move everything to the final display location if you can, since it will be awkward to move from now on.
If you haven't already, now is the time to cut out the holes for the mirror face, the fog conduit, and the slot for the basin.
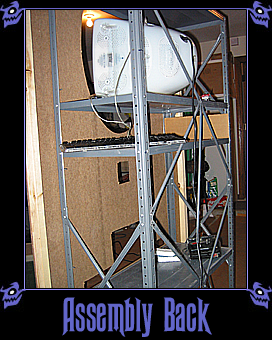
Bolt the center piece onto the shelving unit. To do this, put the center piece up against the shelving unit, and use a pencil to mark on the MDF where the holes should be drilled. Drill the holes, and use the machine screws with some washers to bolt the MDF to the shelving unit.
Duct tape the scrim fabric over the mirror hole. Make sure that there are no wrinkles in the fabric, or else they will show up as lines across the mask's face. We ended up having to iron our fabric to get the creases out - 'wrinkle releaser' type products did not work well enough to remove the crease.
Attach the hinges to the 2' x 2' support beams so that the sides can be angled back. This will allow you to put your facade flush against the wall, but still move the wall enough to allow easy access to the back room.
Use the carpet tape to attach the foam onto the MDF. Use generous amounts of tape to get a secure bond. Be careful when pressing the foam facade onto the MDF - you don't want your handprint in the stone!
Attach the lion's head with more carpet tape. Slide the basin assembly into the slot so that the interior part lies on the ledge of the shelving unit, and weigh it down so that it is sturdy, and your facade is done!
Optional Features
You may find that you want more detail than just what paint and foam can provide. There are many creative things you can do to add some spooky ambiance to your mirror facade:
- Buy some plastic vines and attach them to the facade, to give it some life.
- Add hooks to the side panels to hold flame lights for an eerie, medieval look. Drill a hole in the facade so that the power cord isn't visible from the front.
- Add something to hide the hinged areas where the side panels are attached. You could paint cardboard tubes with the same paint to make it look like columns, or you could cut strips of foam to look like corner stones.